Standard Procedure for Microinjection of Drosophila Melanogaster Embryos:
Procedure
The entire procedure can be roughly divided into the following 10 steps:
- Setting up batches for embryo synchronization.
- Collecting embryos for injection.
- Pulling capillaries for injection.
- Injection Mixture.
- Injecting these embryos using Eppendorf Femtojet.
- Transfer of the embryos after injection.
- Collection of emerged flies (F0) and setting up of crosses.
- Screening the F1 progeny for positive transformants.
- Balancing the transformants.
- Submission and maintenance of stable lines.
Preparation beforehand:
- a) Grow fly stocks for injection in appropriate number
- b) Prepare sucrose agar plates (2% sucrose & 2% agar dissolved in distilled water). ( Please see the precautionary measure no 12.3)
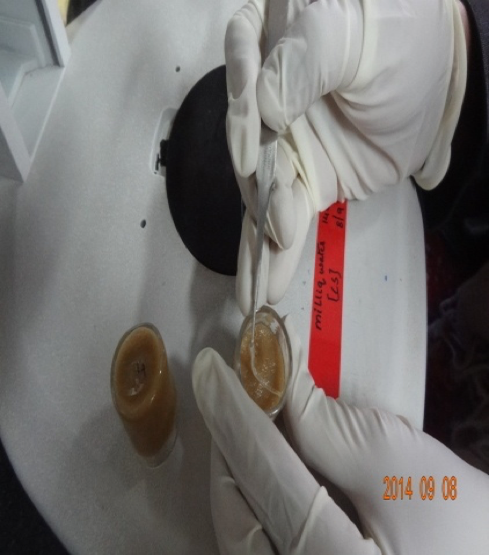
- c) Take yeast granules and sugar granules (5-10) in 50ml falcon tube, mix with water and leave overnight to ferment this can be used next day morning. (Yeast paste prepared once can be used for 4-5 days).
- d) Agar block for aligning embryos is made with 2.4% of agar dissolved in distilled water (standard- 6gram of agar in 250ml of distilled water). ( Please see the precautionary measure no 12.3)
1.Setting up batches for Synchronization:
Maintain stock flies to be used for embryo collection separately under hygienic conditions with regular transfers.
Requirements:
- Stock flies
- Cut bottles with cotton plug
- Petri plates containing sucrose agar media
- Yeast paste
- Cello tapes
fig: Synchronization batch

- Take autoclaved cut bottles with cotton plug and sucrose agar plates with yeast paste (equal to the size of single yeast granule) at the centre of the plate. Make such sucrose agar plates in enough numbers for use throughout the day. Fix the sucrose agar plates with the help of yellow tape to form a bottom for the bottle.
- Transfer the selected fly stock for embryo collection into the cut bottles with sucrose agar plates and yeast paste in it (Yeast paste serves as ready food source for the flies while collecting the embryos). To collect adequate number of embryos, each bottle should contain 100-150 males and 150-200 females.
- Label the bottles appropriately with the stock number or genotype of the stock taken for embryo collection and place it in incubator set at 25o ( Refer quality control measures 13.2)
- Synchronizing the egg laying to the time interval – Change the sucrose agar plates with yeast paste, initially for an hour until enough number of embryos is seen. Reduce the time interval of changing the plates to 1/2 hour until desired numbers of embryos are obtained. ( Refer quality control measures 13.1)
- Note: If freshly emerged adult flies are being used for embryo collection, transfer them into cut bottles, place it in incubator at 25oC and leave for 24 hr before starting to synchronize.
- Once the flies are habituated of laying the embryos every half-an- hour, that batch of flies is called “Synchronized Batch”. (Note: The main idea in synchronizing the flies to lay embryos is to get maximum number of staged embryos for injection in 30 min time.)
2.Collection of the embryos:
Requirements:
- Synchronized fly batches
- Petri plates containing sucrose agar media
- Yeast paste
- Agar block
- A fine brush
- Microscopic slides
- Double sided adhesive tape
- Cover slip
- Microscope( Nikon-SMZ645/ Olympus-SZ51)
- Forceps
- Distilled water
|
fig : embryos in sucrose agar plate
|
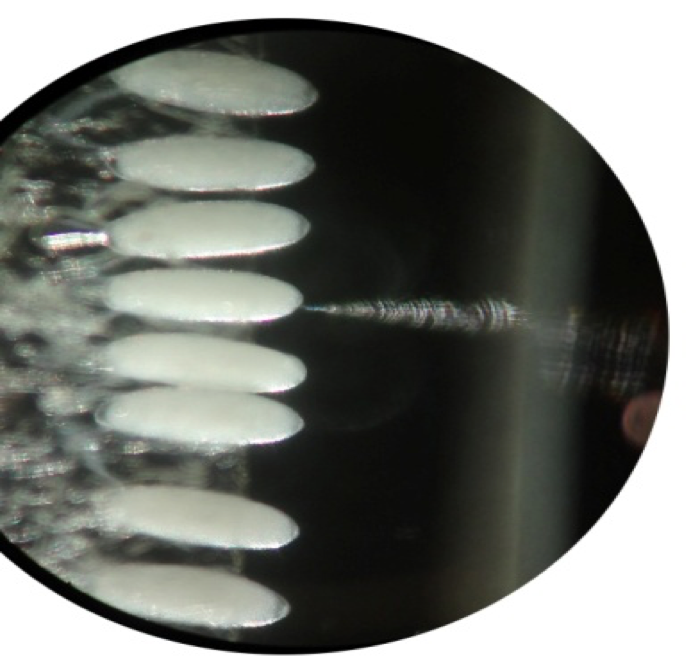
fig: Aligned embryos on agar block |


- Embryos collected every half-an-hour are taken with the aid of the brush and transferred onto the agar block with minimal damage to the embryos.
- Cover slip is placed on the middle of the agar block which serves as support for aligning the embryos.
- Wash the embryos with distilled water and separate the staged embryos(healthy white embryos) from the population.
- With help of fine brush the embryos are aligned one after the other(dorsally resting on agar block), posterior end facing the cover slip within 10 -15 min so that the embryos have not crossed stage 3.
- Double sided adhesive tape is pasted on the edge of the slide with a small gap to pick the embryos aligned on the agar block.
- Place slide on the aligned embryos, 10- 30% of the embryos are placed outside the tape.
Press it gently and pick it up.
- Pulling capillaries using Sutter needle puller:
Requirements:
- Glass Capillaries (Harvard apparatus)
- Micropipette puller (Shutter instrument P97)
In order to make suitable needles for injection the settings of the puller has to be adjusted according to capillaries and puller used. In general, length and tapering of the needle depends upon the temperature at which the glass is heated, pulling velocity and time taken for cooling. Needles that are too long are more resistant and bend while injecting and those that are too short have very low resistance and will damage the embryos and reduce the rate of survival. Injection needles are then stored in a bar of terracotta kept in a box.
Parameters for pulling capillaries for micro-injection of drosophila:
Heat : 450-550⁰C
Pull : 50-60
Velocity: 55-70
Time : 150-210 milli seconds
*Above parameters vary for different filaments and also for different capillary.
Capillary details: Harvard apparatus – Borosilicate glass capillaries, 1.0 mm outer diameter *0.78 mm inner diameter.
- Injection mixture:
Requirements:
- Plasmid DNA
- Helper Plasmid
- Injection buffer
- MilliQ water
Random integration or P-element mediated transgenesis – Column purified (Qiagen) plasmid DNA of 13µg(1-2µg/µl concentration) + 2.4 µg/µl helper plasmid + make up the volume to 20µl using 2X injection buffer if in case the plasmid is resuspended in MilliQ water(Use 1X Injection buffer to makeup volume when the plasmid is resuspended in 1X injection buffer). (Composition for 50X IB: 0.5mM sodium phosphate buffer (pH-7.5) and 5mM KCl).
Site specific integration/transgenesis –
- For clones <30kb – Required DNA concentration: Column purified (Qiagen) plasmid DNA with 500 – 750 ng/µl + make up the volume to 10µl using 2X injection buffer. (Composition for 50X IB: 0.5mM sodium phosphate buffer (pH-7.5) and 5mM KCl).
- For clones >30kb – The column purified (Qiagen) plasmid DNA with 150 – 250 ng/µl + make up the volume to 10µl using 2X injection buffer. (Composition for 50X IB: 0.5mM sodium phosphate buffer (pH-7.5) and 5mM KCl).
Samples are stored at -20⁰C after usage for 15 days after shipment of transformants.
Loading DNA into the needles:
Keep the Eppendorf vials with plasmid DNA in the ice. Wipe the capillary needle with 70% alcohol wet tissue without touching the tip of the needle. Drop the needle in to the eppondorf containing DNA in the position tip facing up. Due to capillary action DNA will rise into the needle. After 1-2 min a concave meniscus is seen at the neck of the needle which indicates the capillary is filled with DNA.
- Injecting the embryos using Eppendorf Femtojet:
Requirements:
- Moisture box
- Eppendorf Femtojet
- Aligned embryos
- Halocarbon oil
- Needle
- Distilled water
- Injection microscope ( Nikon eclipse TS100)
- Moisture box
|
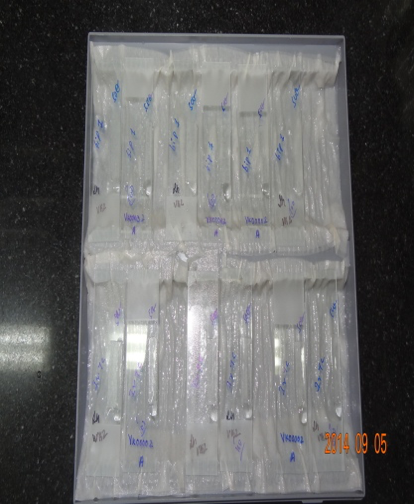
Fig: Double sided gum tape with aligned embryos for micro- injection
|
Fig : Micro-injection
|

|
fig : Injected embryos kept in moisture box
|
fig : Transferring embryos to media cut vial
|
- Take sterile surgical blades and forceps and cut the extra part of tape in which embryos are not present. ( Please see the precautionary measure no 12.1)
- Take out the remaining part of the tape in which injected embryos are present with the aid of forceps and transfer it to the media cut vial.
- Transfer all the injected embryos of same construct in a cut media vial and mark it as it was on the injected slides and write the transferred date. ( Please see the precautionary measure no 12.2)
- Regular monitoring of these vials is mandatory as the media vial may get dried or yeast might overtake the embryos. Add double distilled water when ever in order to avoid drying as this might affect survival rate of injected embryos.
7.Collecting the emerged flies (F0) and crossing:
Requirements:
- Media vials( Refer media preparation method 14)
- Brush
- Microscope(Nikon- SMZ645/ Olympus-SZ51)
- Carbon dioxide apparatus
Random or P-element Integration:
Collect the G0 flies that have emerged from the injected embryos after 12 – 15days, cross each fly with opposite sex of w–; Tft/CyO flies (in 1:3) in media vials. (Refer quality control measures 13.3)
Site specific integration:
Collect the G0 flies that emerge after 12 -1 5 days, and cross males and females(in 1:1 ratio) to get F1 offspring. This parental cross is transferred to fresh media vials after 5-6 days. (Refer quality control measures 13.3)
8.Screening the F1 progeny for positive transformants:
Requirements
- Media vials( Refer media preparation method 14)
- Balancer flies
- Brush
- Microscope (Nikon- SMZ645/ Olympus-SZ51)
- Carbon dioxide apparatus
Random or P-element Integration:
- Screen the progeny (F1) from each cross for selectable marker for eg. mini white eye, fluorescence etc. in the flies. These are the positive transformants/transgenics that have inherited the integration. ( Please see the precautionary measure no 12.5)
- Take the transgenic fly (preferably male) with any one marker either CyO or Tft from each different line and cross it with w–; Tft/CyO to map the chromosome in which the gene is integrated. ( Please see the precautionary measure no 12.4)
Site specific integration:
- Screen the progeny from the cross for positive transformants
- Mini white eye (yellow – orange) for a selectable marker- white+ in the given plasmid
- Fluorescence in eye ( RFP)for a selectable marker-3xP3-RFP or 3xP3-ds-Red in the given plasmid( Please see the precautionary measure no 12.5)
- Cross the transgenic F1 fly, preferably males with respective balancer stock of opposite sex. ( Please see the precautionary measure no 12.4)
|
Fig : Screened for transgenic fly( mini white eye)
|

9.Balancing the transformants
Requirements
- Media vials( Refer media preparation method 14)
- Balancer flies
- Brush
- Microscope (Nikon- SMZ645/ Olympus-SZ51)
- Carbon dioxide apparatus
Random or P-element Integration:
After getting the mapping results, balance the transgenic on the resulted chromosomes using respective balancer stock. (Refer quality control measures 13.4)
If it is on 3rd chromosome- w+ CyO male crossed withw– ; TM3Sb/TM6Tb virgin females.
If it is on 2nd chromosome- w+ CyO male crossed withw– ;Tft/CyO virgin females.
If it is on 1st chromosome- w+ CyO virgin female crossed withw– ;FM7a males.
Site specific integration:
From the F1 crosses male (progeny) transgenic with a selectable marker flies are taken (1no) crossed with virgin females (5-6 no) of balancer stock.
From the above cross collect pure flies of selectable marker to obtain a balanced stock. ( Refer quality control measures 13.4)
10.Submission and maintenance of stable lines
Requirements
- Media vials( Refer media preparation method 14)
- Bar coding machine
- The balanced lines are cross checked for next generation by two people to ensure the lines which are developed are pure with selectable markers. Then they are labelled with construct name and on which chromosome it is balanced on.
- For in house users- Interact with a concerned user through web portal and ask them to collect the balanced stock.
- For external user- Plastic vials containing embryos of stable stock is packed and shipped to the user. Through web portal the tracking number is sent to the user with the specifications of the particular construct.
- The constructs are maintained in the facility for 15 days and again the reminder mail is send to the user asking weather lines are growing well. Lines are reshipped if there is a requirement if not it’s thrown after 10 days.
11.Drosophila Anaesthesia CO2 station:
The Drosophila CO2 Work Station allows flies to be anaesthetized with unparalleled precision, convenience, and safety. It has many advantages over ether because it is safer to use and less toxic, both for the researcher and for the flies.
CO2 set up need- CO2 cylinder, Tubing, Adjustable knobs, T-fitting, CO2 bubbler, Fly pads, Flow control fittings for blow gun and fly pad.
Fly pads– provides an even flow of CO2 to keep flies anesthetised during microscopic examination. With a large surface area of 8.9 x 12.7 cm (3.5 x 5.0 in.), the pads are less than 1 cm thick, making them the most convenient to work with under the microscope. High quality porous polyethylene is used to make fly pads.
CO2 cylinder-Any number of stations can share the same compressed gas source, the quantity of CO2 that flows through the chamber is controlled by the valve on the gas cylinder.
CO2 Bubbler– Bubblers help prevent your flies from becoming dehydrated while also helping in the reduction of static electricity on fly pad.
Hand-operate valve– Allows the user to deliver just the right amount of CO2 to keep flies asleep.
Drosophila Anaesthesia CO2 Blow gun-Is used in order to anesthetize the flies before placing them on the CO2 pad. a simple hollow needle,can be hooked up to the hose from the CO2 bottle and introduced into the Drosophila culture vial, between the glass wall and the stopper.
12.Mandatory precautions to be taken during microinjection and the after processes:
- Latex gloves have to be used by injectors and individuals transferring injected embryos as they are in direct contact with Halocarbon oil which is a carcinogen.
- Used needles and slides need to be discarded according to safety norms set by the institution.
- Used agar sucrose plates should be discarded in agar waste bin.
- Stock flies and balancer flies need to be checked at regular intervals for contamination.
- Use face mask while doing fly pushing.
- Samples once taken out from storage should be placed in ice till the injection is completed and later placed back in -20⁰C (BAC- 4⁰C)
- Quality control steps:
- Before setting batches for synchronization , flies need to be checked twice for any contamination (eye colour, marker etc. ) by individual who collects the flies and also by individual setting batches for the day (Note : Never the same individual for the 2 jobs ).
- Every time a batch is set make it a point to check the flies under microscope for contamination.
- Adults emerging from the injected embryos should also be checked for contamination.
- Every stage of fly pushing should be updated to the person in-charge of updating and maintaining the blog.